Alizé™
Nail Dust Collector Setup Guide
1. Getting Started
Unpacking Your Product
- Carefully unpack your 4BLANC® product. Inspect the package for any visible damage during shipment.
- Ensure all components are included (see the picture).

2. Installation Guide
Step-by-Step Installation
Assemble your dust collector by scanning the QR codes on the box to access the video tutorials. You can also find detailed installation instructions, recommendations, and helpful tips for using your dust collector below.

It is important to install the filter correctly
The filter is installed correctly when the dust collector housing is securely screwed on, and the inside of the filter is visible through the upper flower-shaped hole (see image). The filter should fit snugly in its compartment to ensure a hermetic seal. You can verify the dust collector’s functionality by testing it with a sheet of paper or directly during a procedure.


Clamp Installation
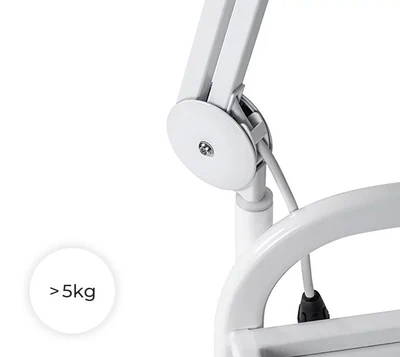
A table/countertop mount is included with your dust collector. When installing it on a pedicure cabinet or cart, ensure that the surface is stable and that the cabinet weighs at least 5 kg. If mounting on a table, the recommended distance between the table edge and the work area should be at least 50 cm.
Alternatively, you can purchase a reinforced floor stand from our website. This stand will provide additional stability, making the dust collector more transportable. You won’t have to worry about the weight and dimensions of your table or cabinet.

Correct position
To ensure that the dust collector housing does not fall off, it should be positioned along the same axis as Adjustable Arm. When installed this way, the dust collector will sit evenly and stably. To prevent deformation of the Adjustable Arm, make sure the dust collector is positioned correctly, as shown in the pictures.
SAFETY EQUIPMENT
WARNING: Keep hair, clothing, and small objects away from the meshed openings and the motor blades.
When the dust collector is turned on, you will hear a characteristic sound similar to the startup of an airplane jet engine. Do not be alarmed; this is a normal feature of this type of motor.
When the dust collector is turned on, you will hear a characteristic sound similar to the startup of an airplane jet engine. Do not be alarmed; this is a normal feature of this type of motor.


Positioning
As you work, various airborne materials are produced, including fine dust (suspended particles that can harm the respiratory system) and sawdust (larger particles that fall onto the table by their own weight). To ensure proper airflow and effective dust collection, it is essential to direct the airflow towards the dust collector.
For your convenience, position the dust collector at an angle on the side opposite to your working hand (as shown in the video). The dust collector should be placed similarly in the pedicure area to ensure effective dust collection.
If sawdust clings to your glove due to static electricity, simply run the palm of your hand over the suction surface to remove it.
Cleaning and care
To keep your dust collector operating smoothly, it’s important to clean and replace the filter regularly. We recommend cleaning the filter 3–4 times per month (approximately every 20–30 procedures).
Important: The filter should never come into contact with water or other liquids!
When cleaning the dust collector or replacing the filter, always wear protective equipment such as a mask and gloves for your safety.


How frequently to change the filter
We recommend replacing the filter with if there is a noticeable reduction in the suction power. The filter typically lasts 2 to 6 months, depending on usage and how regularly it is emptied and cleaned.
For specialists, particularly those providing podiatry treatments, we advise evaluating the risks associated with cleaning the filter. As the dust may contain opportunistic pathogens, it’s safer to replace the filter every 1-2 months instead of cleaning it.
Remember: Your health is more important than saving money on replaceable filters. You can order replacement filters directly from our shop.
Useful life hacks
Proper Sitting Position:
When working with a client at the manicure table, use a palm rest to elevate the client's hands. This helps align your posture, reducing back strain and tension.
Avoid pointing your hands directly at the table or slouching. Instead, keep your body aligned and maintain a neutral, comfortable posture.
Stretching Tips:
To prevent stiffness, take short breaks between client sessions to stretch and do exercises that relieve tension in your back, neck, and shoulders.
Removing Material
When removing material, set the cutter speed to 25,000–30,000 (Revolutions Per Minute) RPM. This speed helps slow down the particles, allowing them to form a stream that can be directed towards the dust collector for better suction.

